
In this short step-by-step blog post, you will find all the steps to add Julia to your Jupyter Notebook environment and run code inside Jupyter Notebook or Jupyter Lab.
Julia is a high-level, high-performance dynamic programming language for technical computing, with syntax that is familiar to users of other technical computing environments. It provides a sophisticated compiler, distributed parallel execution, numerical accuracy, and an extensive mathematical function library.
In order to work in an interactive notebook, we will use a package called IJulia. This allows you to interact with the Julia language using Jupyter/IPython's powerful graphical notebook, which combines code, formatted text, math, and multimedia in a single document.
IJulia is a Jupyter language kernel and works with a variety of notebook user interfaces. In addition to the classic Jupyter Notebook, IJulia also works with JupyterLab, a Jupyter-based integrated development environment for notebooks and code.
In case you do not have Jupyter Notebook installed, please have a look at the Install Anaconda section of the page.
💻 Download & Install Julia
The first step is to install Julia. To do that, head over to https://julialang.org/downloads/ and download the Julia version that fits your machine.
Once you have done that, you should be able to find Julia in your Applications folder (if you're using a Mac).
You then double-click on Julia to open the Julia command line inside your terminal, more commonly known as the REPL (read-eval-print-loop) programming environment.

👉 Add Julia to Jupyter Notebook
In order to add Julia to Jupyter Notebook, you will have to add the IJulia package in our environment.
The general code to install a package in Julia is:
using Pkg
Pkg.add("Package Name")
IJulia is a Julia-language backend combined with the Jupyter interactive environment (also used by IPython).
In order to add Julia to Jupyter Notebook, you’ll need to type the following command and then press ENTER:
using Pkg
Pkg.add("IJulia")
Do not worry if the installation takes a while! In case you have Jupyter Notebook already installed you can create a new Notebook by typing the following statement inside your terminal:
using IJulia
notebook()
👉 Using the Julia Kernel inside Jupyter Notebook
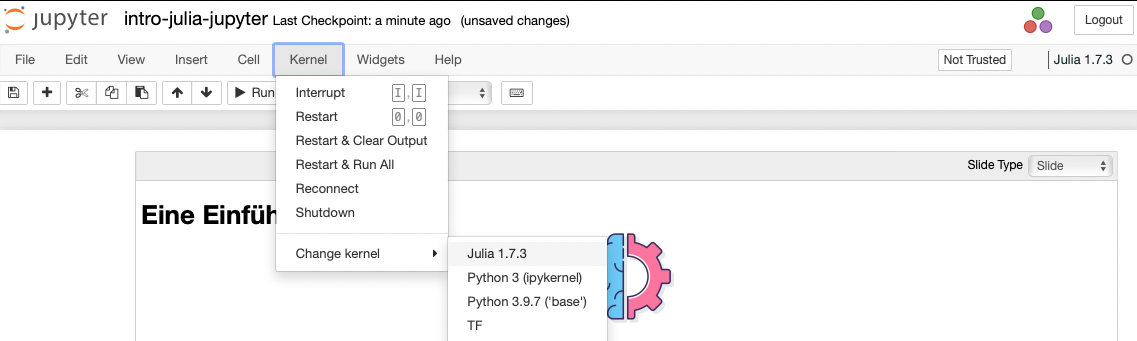
Once you have installed the package, you will also find the Julia Kernel under Kernels in order to properly run Julia code.
🌎 An Easy Way to Install Jupyter Notebook
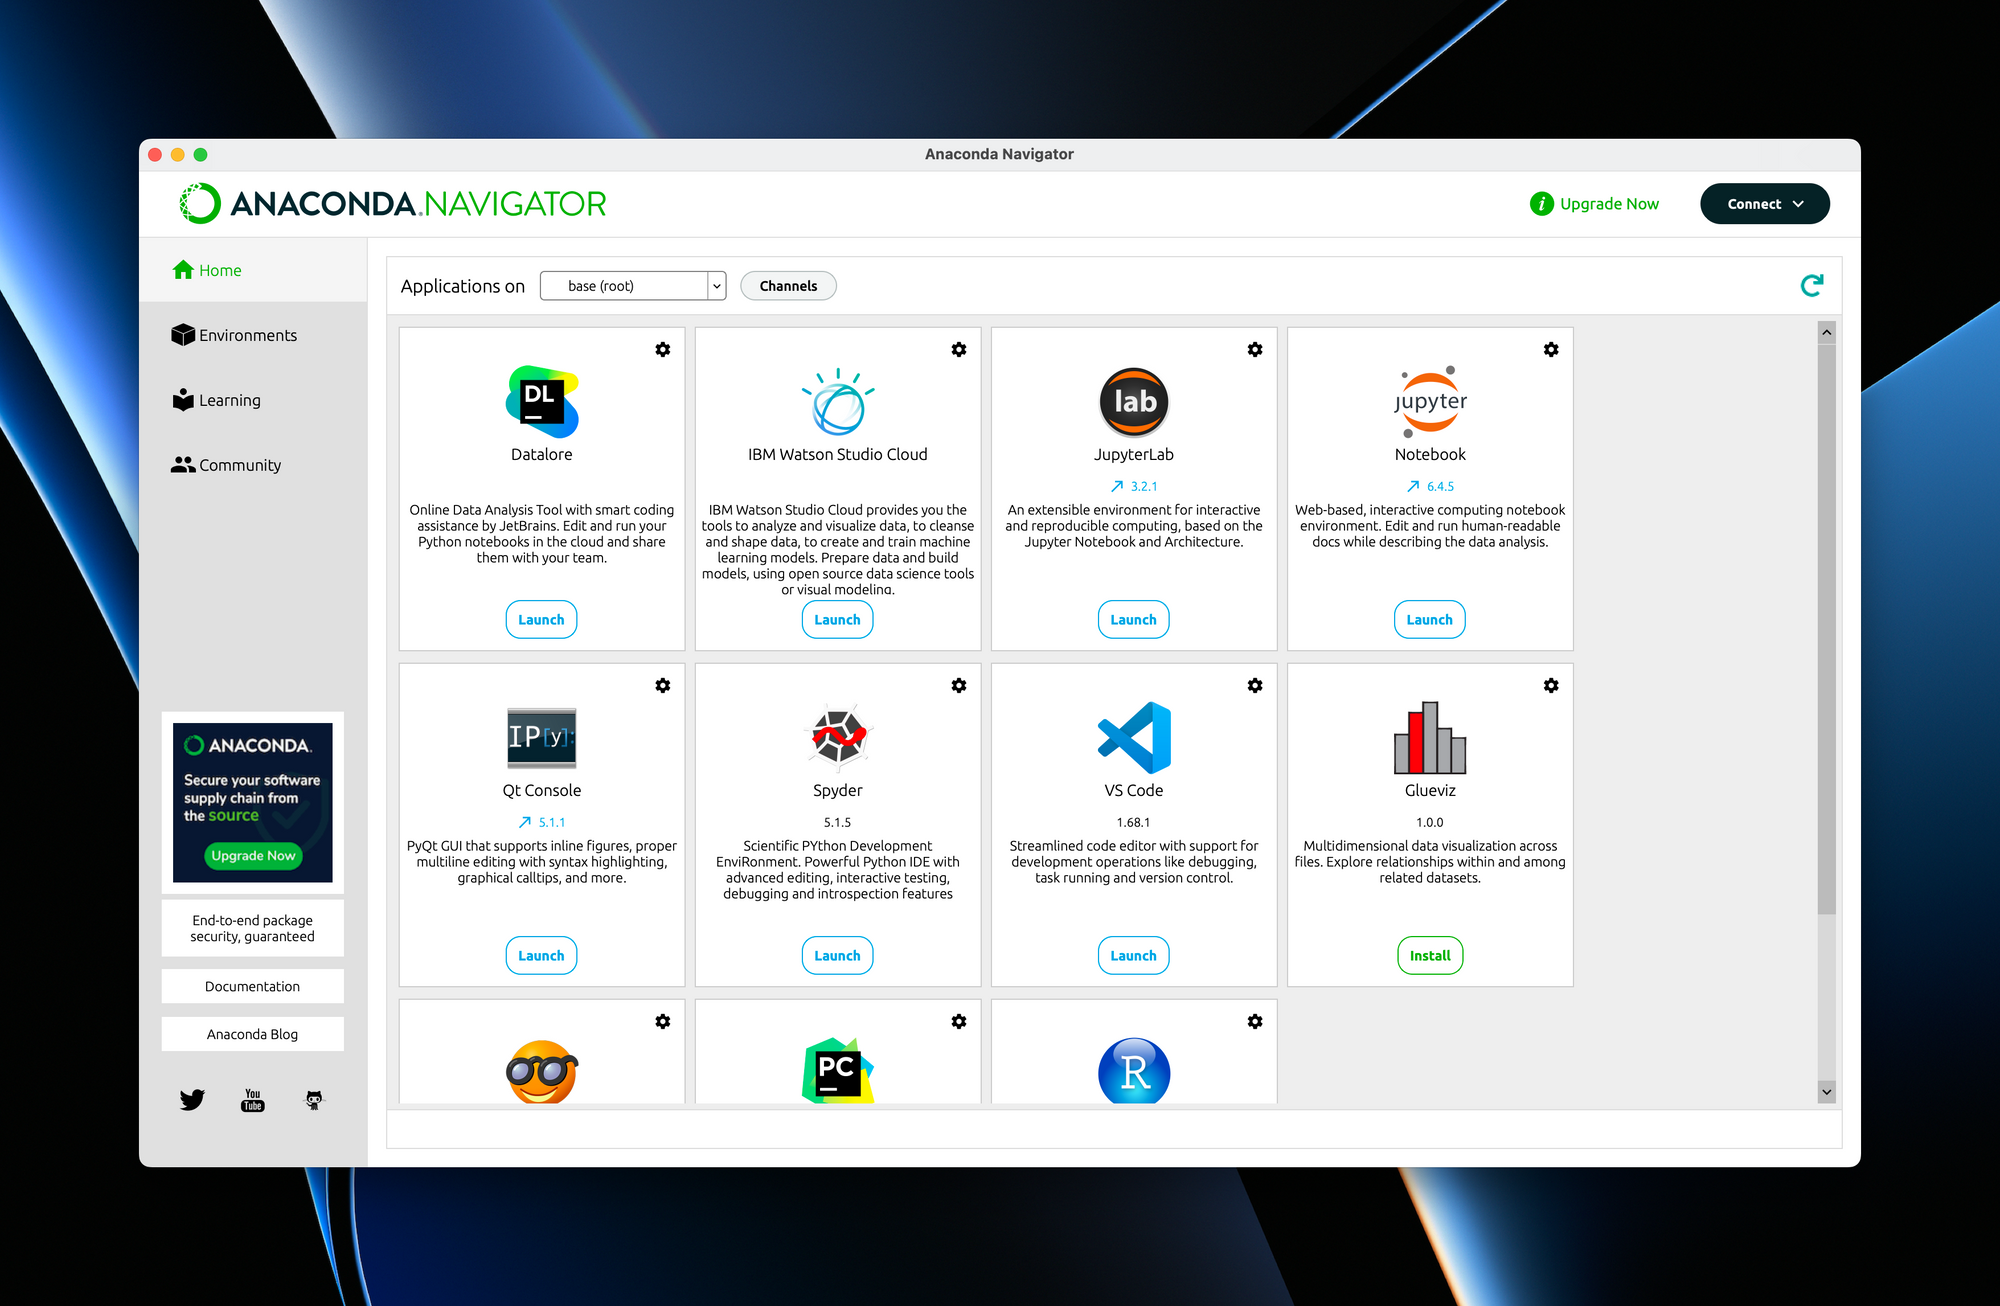
You can download the Anaconda Distribution over here with the version that matches your operating system. download the Anaconda Distribution for your operating system. Once you are done with the installation, click on the Anaconda Navigator and launch the Jupyter Notebook application by clicking "Launch".
Alternatively, you can install Jupyter Notebook or Jupyter Lab via the Python Package Index, the leading repository of software created for the Python programming language.
This page uses instructions with pip, the recommended installation tool for Python. If you require environment management as opposed to just installation, look into conda, mamba, and pipenv.
Jupyter Notebook 🖥️
Install Jupyter Notebook with pip:
pip install notebookOnce installed, launch JupyterLab with:
jupyter notebookJupyterLab 🖥️
Install JupyterLab with pip:
pip install jupyterlab
Once installed, launch JupyterLab with:
jupyter-labMore details: https://jupyter.org/install
If that post was helpful to you, consider subscribing to my latest blogs, tutorials and course updates – costs you less than a Starbucks coffee! 😉
Keep engineering your mind! ❤️
Jousef